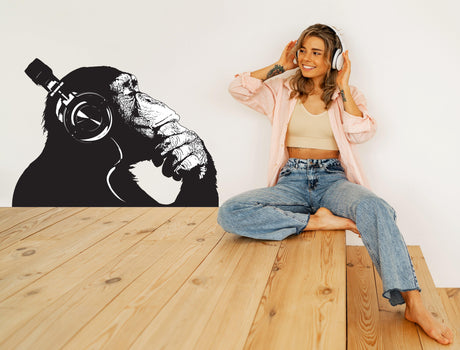
Vinyl wall stickers look simple to use, but most problems appear not because of the material, but because of small mistakes during application. People rush, skip preparation, or misunderstand how wall decals interact with surfaces. As a result, stickers peel off, bubble, or lose their clean look.
This guide breaks down the most common mistakes people make when they apply wall decals and explains how to avoid them. Whether you decorate a nursery, living room, office, or rental apartment, these tips help you get a smooth, long-lasting result without frustration.
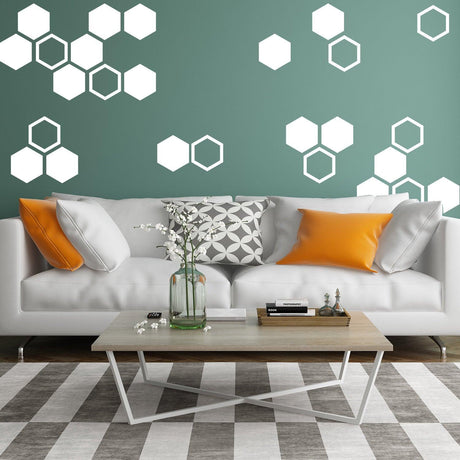
Applying wall decals on the wrong surface
One of the most common mistakes is applying wall decals to an unsuitable surface. Vinyl sticks best to smooth, clean, and properly cured walls.
Freshly painted walls are a frequent issue. Paint needs time to fully cure, often up to two or three weeks. When people apply wall decals too early, adhesion suffers and edges begin to lift. Highly textured walls also create problems. Vinyl cannot bond evenly to rough or porous finishes.
Dust, grease, or invisible residue can also weaken adhesion. Even clean-looking walls may carry oils from hands or cleaning products. Before applying decals, the surface should be wiped with a dry or slightly damp cloth and allowed to dry completely.
Choosing the right surface from the start saves time and prevents unnecessary damage to both the wall and the sticker.
Skipping surface preparation before application
Many people underestimate preparation and move straight to sticking. This shortcut often leads to bubbles, peeling corners, and uneven placement.
Surface preparation is simple but essential. Walls must be dry, dust-free, and at room temperature. Cold walls reduce adhesive flexibility, making it harder for decals to bond evenly. Warm indoor conditions help vinyl adjust and lay flat.
Another overlooked step is measuring and planning placement. Without light pencil guides or visual markers, decals often end up crooked. Removing and repositioning multiple times weakens adhesion and increases the risk of tearing.
When you apply wall decals carefully and prepare the surface properly, the final result looks intentional rather than rushed.

Removing the backing too quickly
Peeling the entire backing off at once is a common beginner mistake. This makes large decals difficult to control and increases the chance of wrinkles or misalignment.
The better approach is gradual application. Peeling a small section of backing and pressing the decal slowly allows better control. This method helps smooth the vinyl as it touches the wall and prevents air from being trapped underneath.
Large vinyl wall stickers benefit from working in sections. Applying from top to bottom or from the center outward reduces tension and improves alignment. Rushing this step often leads to uneven edges or visible bubbles that are hard to remove later.
Patience during this stage makes a noticeable difference in the final appearance.
Ignoring air bubbles instead of fixing them early
Small air bubbles may seem harmless at first, but ignoring them usually makes the problem worse. Over time, trapped air can cause sections of the decal to lift or crease.
When applying wall decals, bubbles should be addressed immediately. Gentle pressure with a soft cloth or card helps push air toward the edges. Working slowly ensures even contact between vinyl and wall.
If a bubble appears after placement, lightly lifting the nearest edge and smoothing again often solves the issue. High-quality vinyl allows minor repositioning without damage if done carefully.
Fixing bubbles early preserves the clean, painted-on look that vinyl decals are designed to create.
Applying decals in the wrong order
Order matters, especially with multi-part designs. Many people apply elements randomly, which leads to spacing issues or an unbalanced layout.
Most vinyl wall stickers come with a suggested sequence. Starting with the largest elements helps establish the visual structure. Smaller details should follow, filling the space naturally.
Applying decals in the wrong order often forces repositioning later. This weakens adhesive strength and increases the risk of tearing. Planning the sequence before starting reduces mistakes and saves time.
A structured approach ensures the design looks cohesive and intentional.
Using too much pressure during application
Pressing too hard during application can stretch the vinyl or create unwanted texture. Vinyl is flexible, but excessive force distorts shapes and edges.
Even pressure works best. Smooth motions with light, consistent pressure allow the decal to bond without deformation. Sharp tools or hard scrapers can damage the surface or leave marks.
Vinyl wall decals are designed to adhere with gentle contact. Let the adhesive do the work instead of forcing it into place.
Applying decals in poor lighting conditions
Lighting affects accuracy. Applying wall decals in dim or uneven light makes it harder to see alignment issues or air bubbles.
Good lighting helps identify imperfections early. Natural daylight or bright overhead lighting allows better control during placement. Shadows can distort perception, causing crooked alignment.
Taking time to adjust lighting before starting improves precision and reduces the need for corrections later.
Not considering room temperature and humidity
Environmental conditions matter more than many people realize. Cold rooms make vinyl stiff and less adhesive. High humidity can interfere with bonding.
Ideal conditions are moderate room temperature and low humidity. This allows the vinyl to remain flexible and adhere evenly. Applying wall decals during extreme weather conditions often leads to premature peeling.
Waiting for suitable conditions improves durability and appearance.
Repositioning decals too many times
Vinyl decals allow limited repositioning, but repeated adjustments weaken adhesive strength. Each removal introduces dust and reduces grip.
If placement is uncertain, it is better to plan with temporary markers before sticking. This minimizes unnecessary lifting and repositioning.
Applying wall decals once, with confidence and preparation, leads to stronger adhesion and longer-lasting results.
Expecting instant perfection without settling time
Many people expect decals to look perfect immediately. In reality, vinyl needs time to fully bond.
Minor wrinkles or edges often settle within 24 hours. Pressing aggressively right after application can cause damage. Allowing the decal to rest helps the adhesive activate naturally.
Understanding this settling process prevents overcorrection and unnecessary adjustments.