Minimalistlik köök ei pea tunduma tühi ega külm. Puhtad jooned ja lihtsad esipaneelid loovad ruumi, kuid võivad jätta seinad ka viimistlemata välimusega. Seinakleebised aitavad teil lisada iseloomu, rikkumata ruumi rahulikku rütmi. Need asetsevad pinnal tasaselt, ei varasta tööpinnalt ruumi ja on kergesti eemaldatavad, kui meelt muudate. Selles juhendis näete, kuidas kasutada minimalistlikku köögiseina kaunistust kleebistega, millised värvid ja kujundid sobivad kõige paremini ning kuidas neid paigutada ja hooldada, et ruum püsiks valgusküllane, korras ja funktsionaalne.
Miks minimalistlik köögiseina kaunistus sobib nii hästi kaasaegsetesse kodudesse
Minimalistlik disain tugineb paarile selgele põhimõttele: vähem visuaalset müra, rohkem funktsionaalsust ja keskendumine kvaliteedile kvantiteedi asemel. Köögis tähendab see tavaliselt lamedaid kapi esikülgi, neutraalseid värve ja piiratud aksessuaare tööpinnal. Negatiivne külg on see, et ruum võib hakata välja nägema pigem müügisalongi kui kohana, kus inimesed süüa teevad ja vestlevad.
Minimalistlikud kleebised annavad paljaste seinte ja raskete kaunistuste vahele lisakihi. Need lisavad jooni, vorme ja väikeseid aktsente ilma füüsilisi objekte lisamata. Kuna kleebised on lamedad, ei konkureeri need hoiustamise, köögitarvikute ega seinariiulitega. Saate seintele isikupära, jättes samal ajal ruumi kõigele vajalikule.
Teine eelis on kontroll. Sina otsustad täpselt, kuhu pilk peaks minema. Õhuke joongraafika pritsmeplaadi kohal võib juhtida vaadet mööda tööpinda. Väike kujundite grupp söögitoa nurga kõrval võib määratleda hubase tsooni. Erinevalt raamitud kunstist ei vaja kleebised puurimist ega konksude täiuslikku joondamist. Kui üürid oma kodu, saad neid liigutada, uusi kompositsioone katsetada ja jälgedeta eemaldada.
Minimalistlik seinakaunistus aitab ka hooldusvajadust vähendada. Köögid koguvad rasva, auru ja tolmu. Paljude esemetega avatud riiulid vajavad pidevat puhastamist. Mõned lihtsad kleebised puhtal värvitud seinal või plaatidel vajavad vaid kiiret pehme lapiga pühkimist.
Kuidas kleebised sobivad minimalistlikku köögiplaani
Minimalistlikus ruumis peaks igal elemendil olema selge ülesanne. Kleebistega saab raamida võtmealasid: kohvinurka, hommikusöögiletti, sööginurka või pliidiseina. Need sobivad eriti hästi tühjadele vertikaalsetele ribadele ülemise ja alumise kapi vahel, elutoast nähtavatele külgseintele ning lihtsa kella või avatud riiuli ümber olevale seinale.
Eesmärk on toetada ruumi struktuuri. Kui teie köögis on tugevad horisontaalsed jooned, saate nende kajastamiseks kasutada pikki ja madalaid graafikaid. Kui ruum tundub kitsas, aitavad vertikaalsed jooned või kõrged kujundid proportsioone tasakaalustada. Mõelge kleebistest kui vaiksetest silmajuhistest, mitte kui valjudest keskpunktidest.
Minimalistlike kleebiste jaoks õigete pindade ja värvide valimine
Minimalistlik disain eeldab puhtaid pindu. Enne kleebiste paigaldamist vaadake oma kööki kui ruudustikku, mis koosneb erinevatest väljadest: kapid, pritsmekaitse, vaba seinapind, kõrgete kappide külgpaneelid, külmkapi esikülg. Kleebised peaksid asetsema siledatel ja stabiilsetel aladel, kus need saavad hingata ega saa käepidemete ega lülitite poolt kahjustada.
Parimad pinnad on matt- või munakoorevärviga värvitud seinad, siledad plaadid, klaasist pritsmekaitsed ja suurte kodumasinate esipaneelid. Kare krohv või väga tekstuurne värv võib lihtsate kujundite puhtad servad rikkuda ja need uduseks muuta. Kui soovite plaatidel kleebiseid kasutada, valige kujundused, mis kas asetsevad täielikult plaadi sees või ületavad tahtlikult pikki jooni paljude plaatide kohal, selle asemel, et peatuda vuugitäite keskel.
Järgmine kiht on värv. Minimalistlikes köökides kasutatakse sageli valget, halli, musta, beeži ja mõnda aktsenttooni. Atmosfääri kergena hoidmiseks vali üks peamine aktsentvärv ja piirdu sellega. Graafilised mustad jooned valgel seinal loovad selge ja arhitektuurse tunde. Soe beež või terrakota graafika valgel või pehmel hallil taustal kutsub esile rohkem soojust. Pehme roheline sobib hästi puidust ja kivist töötasapindadega ning annab rahuliku ja loomuliku meeleolu.
Väldi liiga paljude küllastunud värvide segamist ühel väikesel alal. Minimalistlik köögiseina kaunistus peaks tunduma osana arhitektuurist, mitte nagu viimasel hetkel lisatud kleebised. Kui sul on kappides juba tugevad värvid, hoia kleebised ühes ruumis esinevatest neutraalsetest toonidest.
Millised värvikombinatsioonid hoiavad teie köögi rahulikuna, mitte külmana
Levinud hirm on, et minimalistlikud köögid näevad steriilsed välja. Peamine on õrn kontrast. Kombineeri valged kapid soojade beežide või liivakarva kleebistega, mitte ainult terava mustaga. Kui sinu köök on tumehall või must, kasuta erksate neoontoonide asemel õhukesi valgeid või pehmeid kivikarva jooni. Puidust töötasapindadele ja baaritoolidele sobivad summutatud rohelised või savikarva kujundid, mis peegeldavad looduslikke materjale.
Kahtluse korral koostage lihtne palett: üks alus (valge või helehall), üks soe aktsent (puit, beež või pehme terrakota) ja üks tume joonvärv (süsi või sügavpruun). Valige kleebised, mis jäävad selle paleti piiresse, ja ruum tundub rahulik ja ühtne.
Ideed minimalistliku köögi seinakaunistuse jaoks kleebiste abil
Minimalistlik ei tähenda igavust. See tähendab tahtlikkust. Kleebised avavad palju vaikseid ja täpseid viise iseloomu lisamiseks. Saate töötada joonjoonistuste, geomeetriliste kujundite, väikeste tekstiaktsentide või stiliseeritud toidu- ja taimemotiividega.
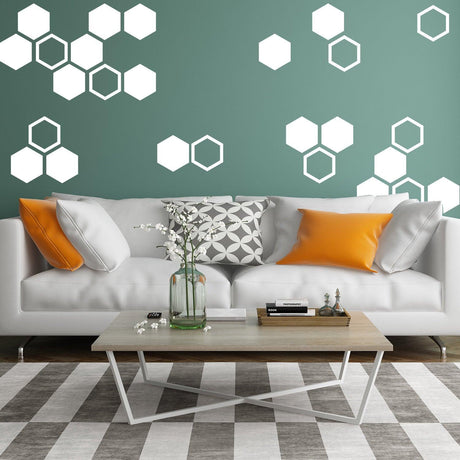
Üks lähenemisviis on lineaarne graafika. Õhukesed, pidevad jooned, mis kajastavad tööpinda, moodustavad kontuuri kohvilaua ümber või joonistavad lihtsa abstraktse laine mööda köögiseina, annavad seinale rütmi, tõmbamata seejuures liiga palju tähelepanu. Teine idee on väikeste kujundite, näiteks ringide või punktide, kobar, mis on paigutatud heldete vahedega, moodustades söögilaua kohale lahtise tähtkuju.
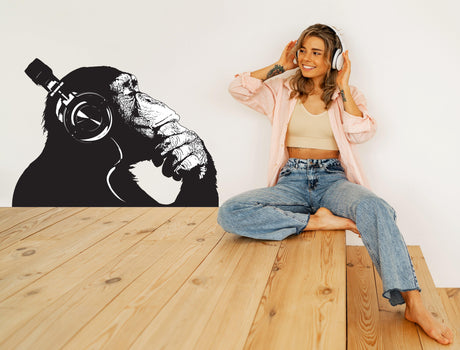
Stiliseeritud ikoonid sobivad hästi väikestesse aladesse. Minimalistlikud tassid ja veekeetjad kohvibaari jaoks, kahvlid ja lusikad sööginurga lähedal või lihtsad ürdisiluetid riiuli kohal koos päris taimedega. Hoidke kujundid vähendatud, minimaalse või olematu varjutamisega, et üldmulje jääks hele.
Võid kasutada ka sõnakleebiseid, aga toon on oluline. Lühikesed, neutraalsed sõnad nagu „kohv“, „kokkama“, „kogunema“ puhtas sans serif kirjas sobivad minimalismi. Pikad tsitaadid ja käsikirjad tunduvad tavaliselt kirjud ega vanane hästi.
Pärast ideede kogumist visandage paigutus paberile või tehke telefoniga seinast pilt ja joonistage sellele. See aitab teil näha, kui palju ruumi iga idee vajab ja kus see võib kappide või pistikupesadega kokku põrgata.
Lihtsad minimalistlikud kleebiste ideed köögile:
- Ühejoonelised joonised, mis järgivad tööpinna pikkust.
- Väikesed geomeetrilised kobarad hommikusööginurga või baari kohal.
- Pisikesed ikoonid, mis tähistavad funktsionaalseid tsoone nagu kohv, tee või vürtsid.
- Stiliseeritud ürdisiluetid riiuli lähedal, kus on päris taimed.
Kõiki neid ideid saab ehitada mõnest tükist, mis hoiab paigaldamise kiire ja lõpptulemuse puhtana.
Kuhu kleebiseid paigutada, et köök ikka puhas tunduks
Aseta kleebised kohtadesse, kuhu kööki sisenedes pilk loomulikult puhkab: kapi otsa, ukse vastas olevale seinale, söögilaua kohale. Väldi väikeste nurkade täitmist, kus on juba palju esemeid, näiteks noahoidjad, köögitarvikute purgid ja avatud riiulid.
Jäta iga kompositsiooni ümber tühja hingamisruumi. Lihtne reegel on hoida kleebiste ja lähedalasuvate kappide, pistikupesade või riiulite vahel vähemalt käe laiune ruumi. See varu aitab kujundusel taotluslikuna tunduda ja lihtsustab puhastamist.
Kuidas minimalistlikke köögikleebiseid paigaldada ja hooldada
Köögid on tööruumid, seega vajavad kleebised stabiilset alust. Enne paigaldamist puhastage pind õrna rasvaeemaldusvahendiga, loputage puhta veega ja kuivatage täielikult. Isegi õhuke toiduvalmistamisest tekkinud rasvakiht võib aja jooksul liimi nõrgestada.
Kui sein on kuivanud, märkige oma paigutus maalriteibiga või heledate pliiatsijoontega. See samm on eriti oluline minimalistliku disaini puhul, sest valesti joondatud sirgjooned paistavad kohe silma. Kontrollige kompositsiooni kaugelt ja nurga alt, kust te tavaliselt seina näete, näiteks elutoa diivanilt või söögilaualt.
Kui olete paigutusega rahul, paigaldage kleebised aeglaselt.
Köögi seinakleebiste paigaldamise põhietapid:
- Alustage disaini kinnitamiseks keskmisest või pikimast tükist.
- Koorige väike osa aluspaberist tagasi ja joondage kleebis teibijuhikutega.
- Kinnitage ülemine serv kergelt ja seejärel koorige ülejäänud aluspaber maha, samal ajal kleebist allapoole siludes.
- Kasutage õhumullide keskelt servade poole väljasurumiseks pehmet lappi või kaabitsat.
- Lisa põhielemendi ümber väiksemaid tükke, kontrollides samal ajal joondust.
Pärast kleepimist ärge vähemalt ühe päeva jooksul pühkige kleebiseid, et liim saaks kuivada. Hiljem puhastage neid pehme lapiga ja õrna seebiga. Ärge kasutage kilel abrasiivseid käsnasid ega teravaid tööriistu.
Keedutsoonides on aur ja väikesed pritsmed normaalsed, kuid otsene kokkupuude tugeva kuumusega ei ole ideaalne. Hoidke kleebiseid eemal lahtisest leegist ja väga kuumadest pindadest, näiteks gaasipliidi küljest ilma kaitsepaneelita.
Köögis kleebiste kasutamisel esinevad levinud vead, mida vältida
Köökides korduvad mitmed probleemid. Kleebiste kleepimine rasvasele värvile või otse aktiivse köögipinna kohale viib sageli servade kerkimiseni. Graafiliste joonte paigutamine kohtadesse, kus neid pidevalt potid, toolid või kapiuksed tabavad, lühendab samuti nende eluiga.
Teine viga on iga tühja seina risustamine. Minimalistlik köögiseina kaunistus toimib kõige paremini, kui valid ühe või kaks fookustsooni ja jätad ülejäänu lihtsaks. Lõpuks väldi kleebiste liiga tihedat lõikamist pistikupesade või lülitite ümbert. Väikesed ebakorrapärased lõiked rikuvad puhta ilme ja loovad nõrku kohti, kust kile võib hakata kooruma.
Ostja juhend: kuidas valida minimalistlikku köögiseina kaunistust Decordsist
Decordsi sirvides alusta suuremast pildist. Otsusta, milline sein vajab tähelepanu ja millist rolli kleebised seal mängivad: peen raam, fookusjoon või väike aktsent. Seejärel filtreeri valik puhaste ja lihtsate kujunduste poole, millel on ühtlane joone paksus ja piiratud värvid.
Tootefotodel on mõõtkava, aga loe alati ka mõõdud läbi. Ekraanil väike pilt võib päriselus katta suurema osa köögiseinast. Mõõda seina või kapi esiosa ja võrdle seda loetletud suurustega. Pikkade tööpindade puhul on kasulik valida disain, mida saab korrata või pikendada, näiteks mooduljooned või väikesed klastrid.
Materjali üksikasjad on samuti olulised. Otsi kvaliteetsest eemaldatavast vinüülist kleebiseid, millel on matt või madala läikega viimistlus. Selline pind sulandub paremini värvi ja kappide esipaneelidega ning peidab sõrmejälgi paremini kui kõrgläikega kleebised. Kui kirjelduses mainitakse hõlpsat eemaldatavust ilma jääkideta, sobib toode üürnikele ja kõigile, kellele meeldib oma ruumi regulaarselt värskendada.
Enne tellimuse esitamist tutvu lühikese kontrollnimekirjaga.
Kontrollnimekiri enne minimalistlike köögiseina kleebiste tellimist:
- Disain sobib teie kapi stiili ja üldise värvipaletiga.
- Suurused on selged ja sobivad seina, pritsmekaitse või seadme esiosaga, mida soovite kaunistada.
- Kile on eemaldatav vinüül, mis sobib värvitud seintele, plaatidele või metallile.
- Viimistlus (matt või madala läikega) toetab rahulikku ja minimalistlikku välimust.
- Hiljem laiendades saad seda komplekti teiste sama sarja toodetega kombineerida.
Kui kleebised on saabunud, võta aega paigutuse planeerimiseks, selle asemel et kiirustada nende paigaldamisega. Minimalistlik sisustus eeldab täpseid otsuseid. Mõned hästi paigutatud kujundid sobivad sinu kööki paremini kui sein, mis on täis konkureerivaid elemente.