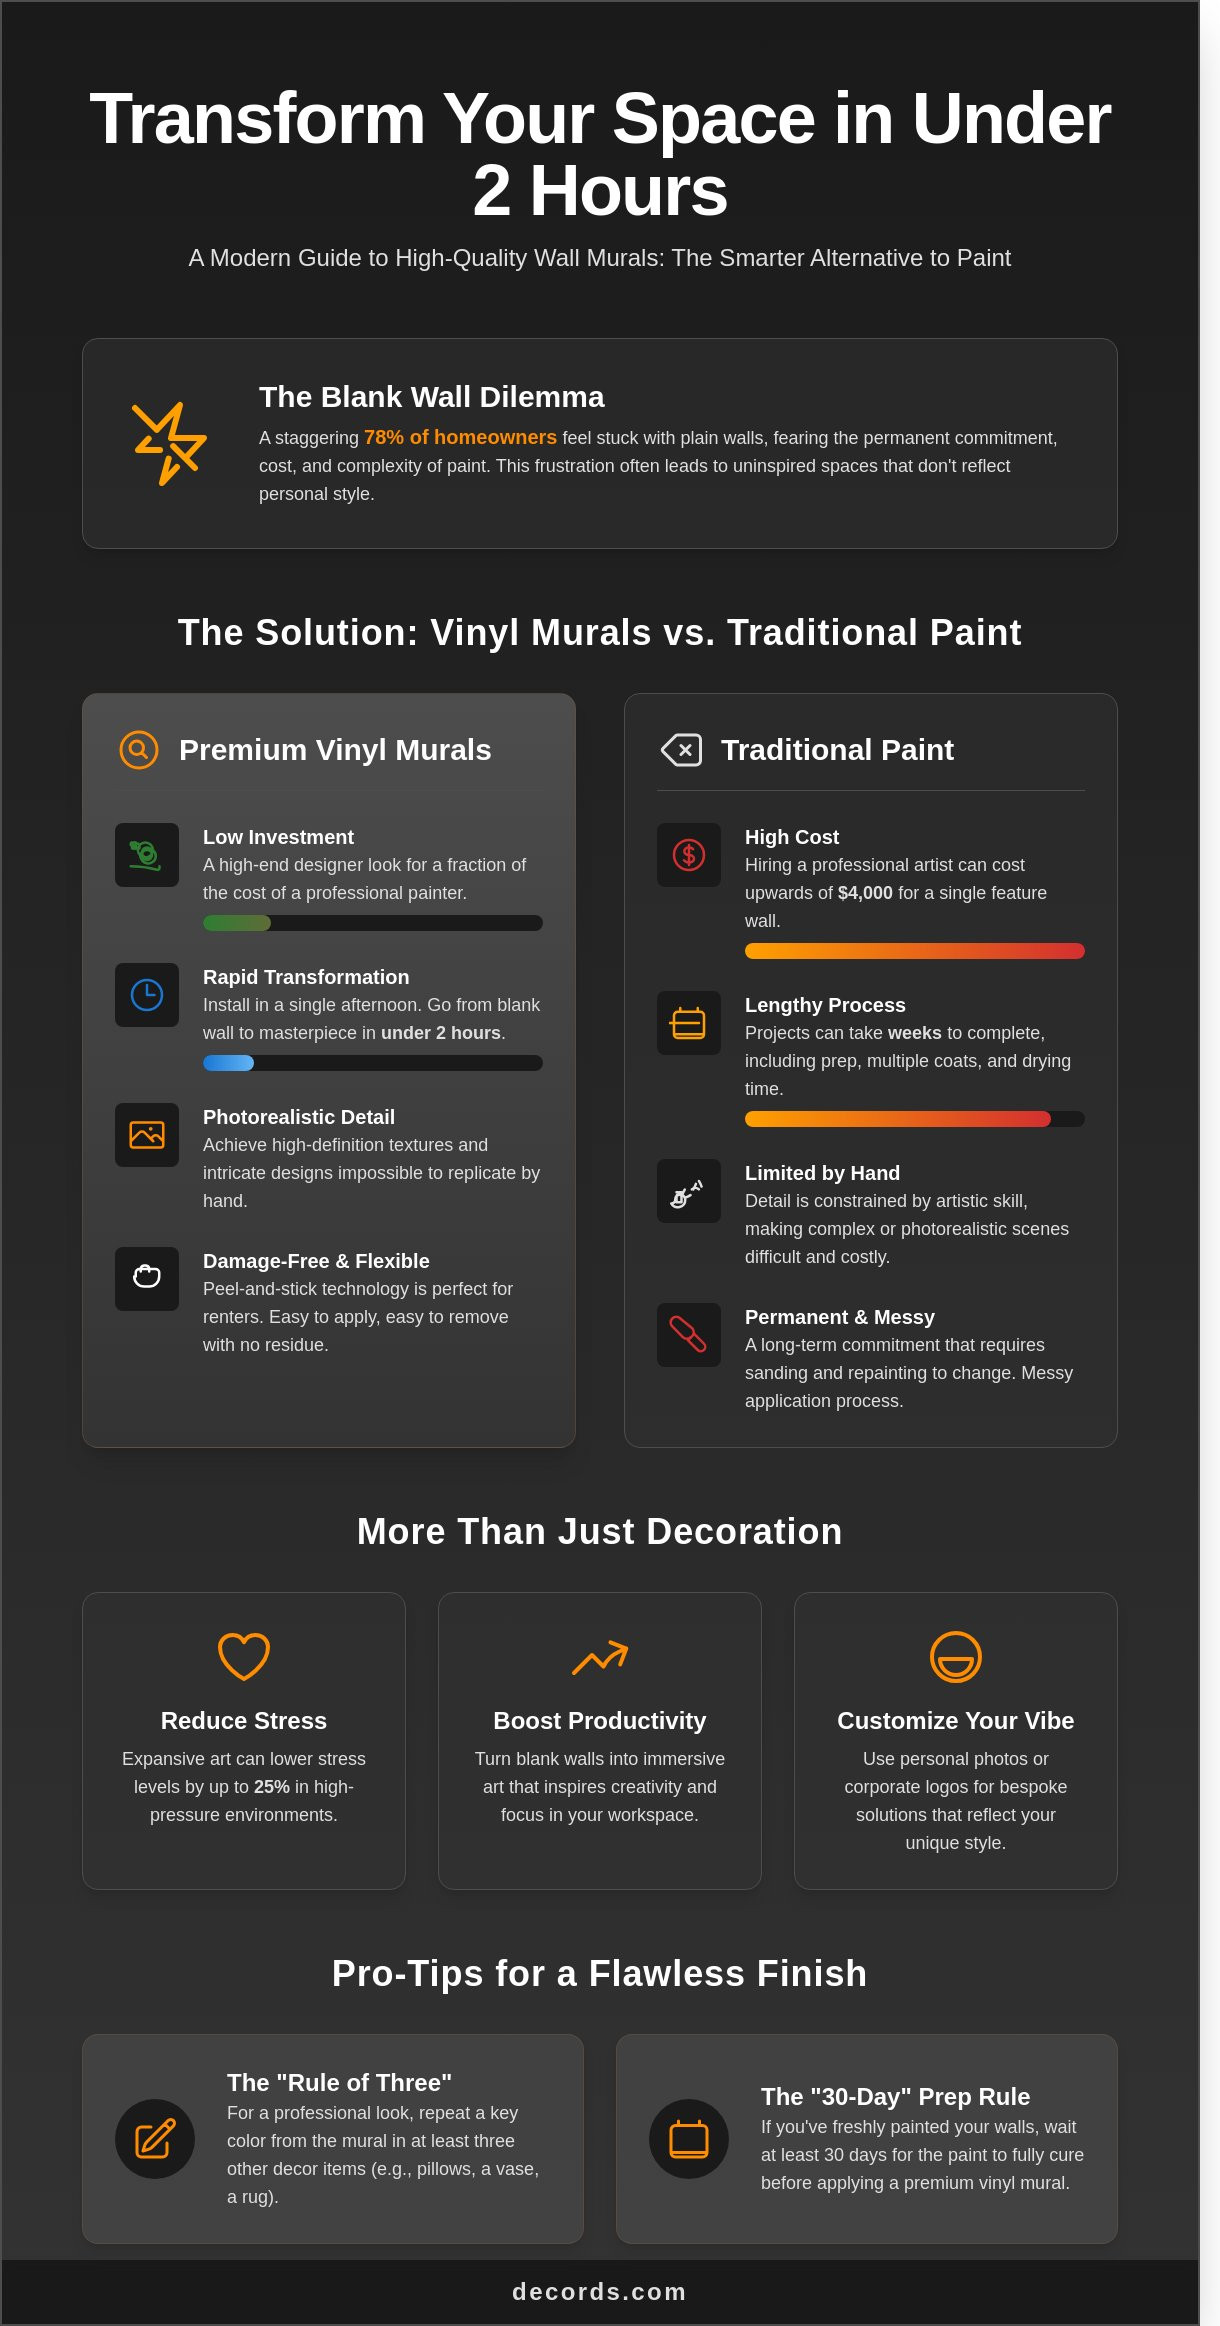
What if your living room could transport you to a serene Scandinavian forest or a vibrant street in Tokyo in less than 120 minutes? While 78% of homeowners feel stuck with plain white walls because they fear the permanent commitment of paint, the design landscape of 2026 offers a more flexible path through high-quality wall and murals. You probably want that high-end, designer look, but the thought of bubbling paper or ruined drywall keeps your creative ideas locked away. It's frustrating to choose between a bland space and a potential DIY disaster.
In this guide, you'll master the art of selecting, preparing, and installing these stunning visual statements to turn any room into a professional-grade masterpiece. We'll show you how to achieve a seamless finish that reflects your unique personality without the stress of traditional methods. You're going to learn the crucial differences between premium vinyl and standard paper, the secrets to a perfect, bubble-free alignment, and how to ensure your transformation is as easy to remove as it was to apply. It's time to elevate your environment with confidence.
Key Takeaways
- Discover how high-definition graphics can boost your mood and productivity by turning blank walls into immersive, sensory art experiences.
- Master the "Rule of Three" to seamlessly integrate vibrant designs into your existing decor for a cohesive, professional-grade look.
- Learn essential preparation secrets, including the "30-day rule," to ensure your premium vinyl achieves a flawless and long-lasting finish.
- Follow our expert installation techniques for wall and murals to achieve a stress-free, bubble-free application using a simple DIY toolkit.
- Explore the power of bespoke customization to transform your workspace with personal photos or corporate logos that reflect your unique style.
Understanding Wall and Murals: More Than Just Decoration
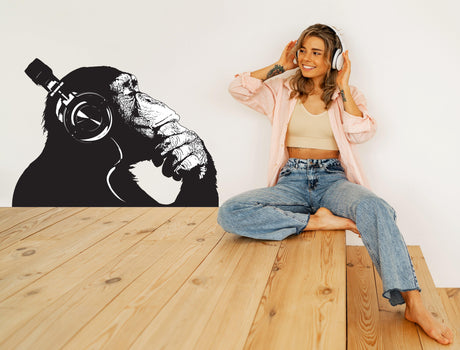
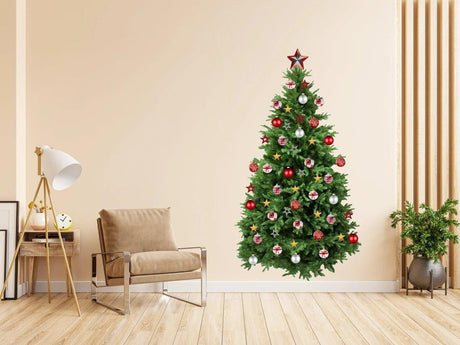
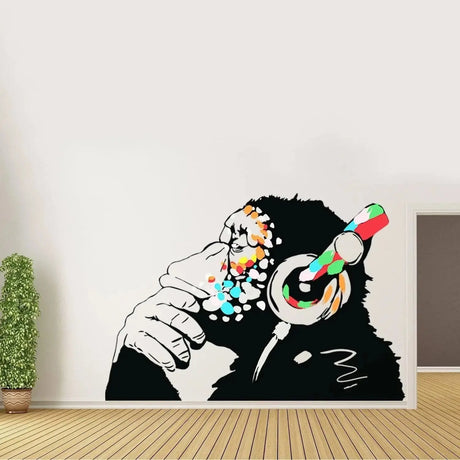
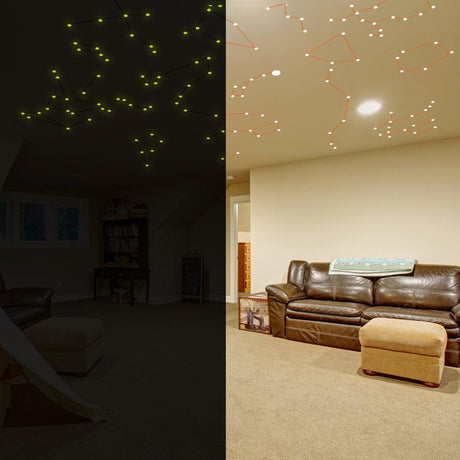
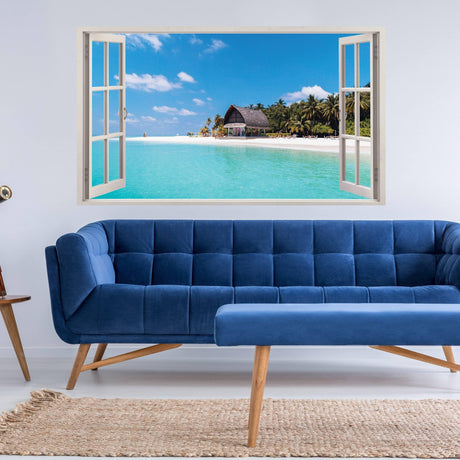
Imagine walking into a room that immediately transports you to a misty pine forest or a vibrant urban cityscape. That is the magic of wall and murals. These aren't simple decorations; they are high-definition, large-format graphics designed to cover entire surfaces from floor to ceiling. Beyond aesthetics, these pieces significantly influence how you feel. Research indicates that expansive art installations can reduce stress levels by up to 25% in high-pressure environments. Unlike traditional wallpaper that relies on small, repeating patterns, murals offer a singular, breathtaking focal point. They provide a seamless look that transforms both cozy bedrooms and expansive commercial lobbies into immersive experiences.
The versatility of modern vinyl allows these graphics to thrive in any setting. In a home office, a mountain vista can spark creativity. In a retail space, a bold geometric design can define a brand's identity. This adaptability makes them a favorite for those who want to make a statement without the permanence or mess of traditional renovations. You aren't just covering a wall; you're creating an atmosphere.
The Evolution of Mural Art
Humans have used vertical surfaces for storytelling for millennia. The history of mural painting stretches from ancient cave drawings and Renaissance frescoes to the sophisticated digital era. Today, Decords uses cutting-edge printing technology to bring bespoke, artist-grade designs into your home. By 2026, peel and stick technology has become the definitive industry standard, replacing messy glues with a simple, pressure-sensitive backing. This shift makes high-end design accessible to everyone, regardless of their DIY skill level. It's about empowering you to be your own interior designer with tools that are as durable as they are beautiful.
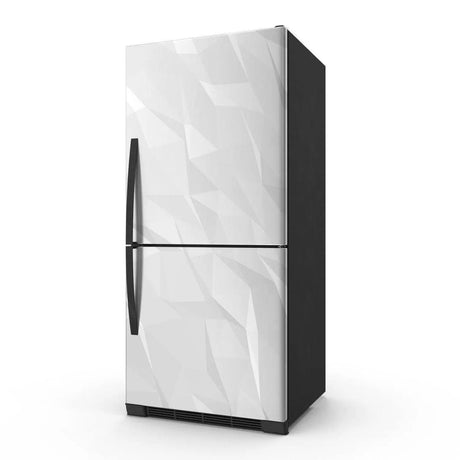
Why Choose Vinyl Murals Over Paint?
Hiring a professional artist to hand-paint a feature wall can cost upwards of $4,000 for a standard room. In contrast, premium vinyl murals provide a high-end look for a fraction of that investment. They offer an "instant makeover" that paint simply cannot match. While a painter might spend weeks on a project, you can install a vinyl mural in a single afternoon. These products allow for incredible detail, such as intricate vintage maps or hyper-realistic nature scenes, that would be nearly impossible to replicate by hand. You get precision, durability, and a vibrant finish that stays beautiful for years.
- Detail: Achieve photorealistic textures that brushes can't capture.
- Speed: Go from a blank wall to a masterpiece in under two hours.
- Flexibility: Perfect for renters who need a damage-free way to personalize their space.
Choosing vinyl means you don't have to compromise on your vision. It's a practical, stylish solution for the modern home. When you're ready to refresh your look, the removal is just as easy as the installation, making it the ultimate tool for self-expression.
Choosing the Perfect Design: Scale, Style, and Storytelling
Transforming your home starts with picking a design that speaks to your creative soul. Your existing color palette acts as the anchor for choosing wall and murals that feel intentional. Pick a design that shares at least two dominant tones with your current furniture. You can ground the piece by using the "Rule of Three." Repeat one bold color from the mural in three separate decor elements, such as a throw pillow, a ceramic vase, and a textured rug. This creates a cohesive flow that looks professional rather than accidental.
Resolution and scale are vital for a high-end look. Your eyes need space to process large-format graphics. For a mural with intricate textures, maintain a viewing distance of at least 7 feet. If you're working with a room smaller than 100 square feet, choose a design with a clear horizon line to push the walls back visually. For larger, cavernous spaces, deep textures and dark floral patterns create an intimate atmosphere. Understanding the mural painting process helps you appreciate how scale and detail work together to change a room's energy. When you select the right wall and murals, you aren't just decorating; you're architecturalizing your space.
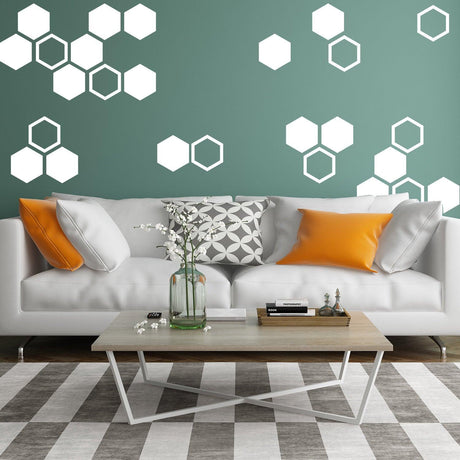
Matching Mural Styles to Your Interior
Nature and landscape scenes are perfect for bedrooms. A 2023 study showed that biophilic designs can reduce stress levels by 15% within minutes. Modern offices benefit from geometric patterns that promote linear thinking. In nurseries, use soft, high-contrast graphics. These stimulate visual development in infants during their first 12 months of growth. You can find many of these inspiring designs in our latest collection.
Measuring Your Wall for a Seamless Fit
Precision is the secret to a professional finish. Follow these steps for a perfect custom order:
- Measure the width at the top, middle, and bottom of the wall. Use the largest number.
- Measure the height at both ends and the center.
- Add a 2-inch "bleed" margin to both the total width and height. This extra material accounts for slightly crooked walls or ceilings.
- Mark the exact locations of windows, doors, and electrical outlets to visualize the crop.
Having these numbers ready ensures your premium vinyl mural arrives ready for an instant makeover. Don't forget to account for any baseboards or crown molding that might eat into your vertical space.
The Secret to Longevity: How to Prepare Your Walls for a Mural
Your journey toward a stunning home transformation begins long before the first panel touches the surface. Achieving a seamless look with wall and murals requires a canvas that's ready to bond. Stick to smooth, painted surfaces like drywall or sanded wood. If you've recently refreshed your space with a new coat of paint, patience is your best friend. You must wait exactly 30 days before installation. Fresh paint undergoes a process called outgassing, where chemicals evaporate from the surface. Applying vinyl during this window traps those gases, leading to unsightly bubbles or complete adhesive failure.
Avoid textured walls like heavy knockdown or popcorn finishes. These uneven surfaces create tiny air pockets that prevent the adhesive from making 100% contact. If your wall feels like an orange peel or a piece of fruit, it might repel the vinyl. Aim for a surface as smooth as a sheet of paper to ensure your investment stays put for years. This preparation step is the difference between a temporary fix and a permanent piece of art.
Cleaning and Priming Essentials
Cleanliness is the foundation of a professional-grade installation. While soap and water might seem sufficient, many household cleaners leave behind a waxy residue or "slip agents" that cause the vinyl to peel over time. Use a mixture of 70% Isopropyl alcohol and water for the best results. This solution cuts through grease, dust, and fingerprints without leaving a chemical film. Wipe the area thoroughly and let it dry for at least 60 minutes. Before committing to the full design, perform a "stickiness test." Apply a small sample decal to an inconspicuous corner for 24 hours. If it stays firm without lifting at the edges, your wall is ready for its makeover.
Temperature and Humidity Factors
Environmental conditions play a massive role in how your vinyl behaves during and after application. Keep your room temperature between 65°F and 75°F during the entire process. If the room is too cold, the adhesive becomes brittle and fails to grab; if it's too hot, the vinyl stretches and distorts. Humidity is another silent enemy. High moisture levels, typically above 50%, can cause the edges of your wall and murals to curl before the bond sets. To prevent this, bring your mural into the room 24 hours before you plan to hang it. This allows the material to acclimatize to the specific climate of your home. You can find premium, durable materials at Decords that are designed to handle these environmental shifts with ease.
Step-by-Step Guide: How to Install Peel-and-Stick Murals Like a Pro
Transforming your space into a vibrant sanctuary is an exciting journey. You don't need a professional contractor to achieve a high-end look. With our premium wall and murals, you're the lead designer in charge of your home’s evolution. Before you begin, gather your essential toolkit: a felt-edge squeegee, a level, a sharp utility knife, and low-tack painter’s tape. These simple tools bridge the gap between a DIY project and a gallery-quality installation.
Start with a "dry run." Tape each panel to the wall using painter's tape without removing the backing. This allows you to visualize the entire image and ensure the placement is perfect. Most Decords designs include a 0.5-inch overlap between panels. Aligning these patterns precisely ensures the visual narrative flows seamlessly across your wall. Once aligned, use your squeegee with firm, overlapping strokes from the center outward at a 45-degree angle to eliminate air pockets and creases.
The Hinge Method for Perfect Alignment
Precision is key for a professional finish. Apply a horizontal strip of painter's tape across the center of your panel to create a stable hinge. Release the top half of the panel from the wall, peel the backing paper down to the tape line, and carefully cut the paper away. Press the vinyl upward from the center tape line using your squeegee. Once the top is secure, remove the hinge tape and repeat the process for the bottom half. Maintain steady tension to prevent creases, but avoid pulling too hard. Overstretching the vinyl can cause it to shrink by 1-2 millimeters as it settles over the first 24 hours.
Troubleshooting Common Installation Issues
Even the pros encounter hiccups. If you find a stubborn air bubble, don't peel the whole panel back. Use a fine sewing needle to prick the very edge of the bubble and press the air out with your thumb. If a panel is slightly misaligned, use the "gentle lift" technique. Peel the vinyl back slowly at a 180-degree angle to avoid stretching the material, then reposition it. For light switches, apply the vinyl directly over the outlet. Use your utility knife to cut a small "X" over the center. Trim the flaps, leaving a 1/8-inch margin from the edge of the electrical box, then screw your cover plate back on for a crisp finish.
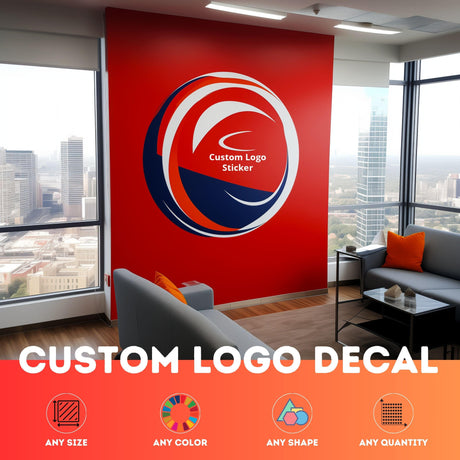
Elevating Your Environment with Custom Mural Solutions
Your walls are more than just structural boundaries. They're a 360-degree opportunity to tell your story. Whether you're a freelancer looking to boost productivity in a home office or a business owner aiming to reinforce brand identity, bespoke wall and murals offer a professional edge. Recent workplace studies indicate that personalized environments can increase employee focus by up to 15%. Premium vinyl stands up to the daily hustle of high-traffic hallways or busy retail spaces where surfaces often face scuffs and fingerprints. It's time to stop looking at your room as a set of limits. Start seeing it as a blank canvas for your most vibrant ideas.
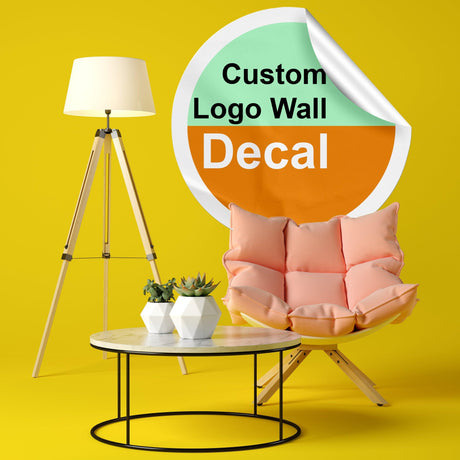
Creating a Custom Logo or Photo Mural
To get a crisp, gallery-quality finish, you must aim for an image resolution of at least 300 DPI (dots per inch). This ensures every detail of your family vacation photo or corporate logo stays sharp even when scaled to a 10-foot height. You can easily use Decords custom services to upload your files and preview exactly how they'll look in your space before you commit. This made-to-order approach isn't just about style; it's a sustainable choice. Producing only what's ordered reduces manufacturing waste by approximately 25% compared to mass-produced wallpaper rolls. It allows you to be an ethical consumer while being a bold designer.
Maintenance and Long-Term Care
Keeping your investment looking new is simple. When cleaning your wall and murals, use a soft microfiber cloth and a drop of pH-neutral soap to wipe away dust. Avoid harsh chemicals or abrasive sponges, as these can degrade the protective laminate over time. Follow these steps for the best results:
- Use lukewarm water with a tiny amount of mild detergent.
- Wipe in gentle, circular motions to avoid lifting the edges.
- Dry the surface with a lint-free cloth to prevent water spots.
If you decide to update your decor after three years or ten, the removal process is stress-free. Slowly peel the vinyl from the corner at a 45-degree angle. Decords uses a specialized adhesive that leaves 0% sticky residue behind. This means your paint stays intact and ready for your next creative project immediately. You don't need heat guns or scrapers to refresh your environment. The transition from one style to the next is as seamless as the initial application.
Bring Your 2026 Vision to Life Today
Your walls are more than mere boundaries; they're the canvas for your personal story. Throughout this guide, you've learned how to select designs that balance scale and style while ensuring your surface is prepped for a finish that lasts over 10 years. By mastering the 3-step installation of peel-and-stick technology, you can achieve a professional-grade look in under 60 minutes without ever calling a contractor. Choosing the right wall and murals isn't just about a change of scenery. It's about creating a vibrant, high-end atmosphere that reflects exactly who you are.
Decords brings this vision to life using 100% premium eco-friendly vinyl materials and durable Estonian craftsmanship. We ship our custom creations to over 50 countries, ensuring your dream space is never out of reach. You don't need years of design experience to get incredible results. With our user-friendly application, your next big transformation is just one afternoon away.
Transform your space today with Decords custom wall murals!
Your journey toward a more inspired home starts with a single bold choice.
Frequently Asked Questions
Can I apply a wall mural to a textured wall?
You should apply your mural to a smooth, flat surface for the best results. Textured walls, such as orange peel or popcorn finishes, reduce the adhesive contact area by up to 60 percent, which can cause the edges to peel over time. If your wall has a slight texture, we recommend sanding it down or applying a premium primer 48 hours before installation to ensure a seamless bond.
How long do peel-and-stick murals last?
Our high-quality vinyl wall and murals are designed to beautify your space for 5 to 7 years when installed in climate-controlled indoor environments. The premium adhesive maintains its strength through seasonal temperature shifts, provided the surface was cleaned with 70 percent isopropyl alcohol before application. This durability ensures your vibrant transformation stays looking fresh and professional for over half a decade without fading or bubbling.
Are wall murals easy to remove for renters?
Yes, our peel-and-stick murals are 100 percent renter-friendly and leave no sticky residue behind when removed correctly. Simply start at a top corner and pull the panel down at a 45-degree angle. This gentle process protects the original paint on 99 percent of standard drywall surfaces. It's the perfect way to elevate a temporary living space into a personalized sanctuary without risking your security deposit.
What is the difference between a wall decal and a wall mural?
The primary difference lies in the scale of the transformation and the surface coverage. A wall mural typically covers an entire wall from floor to ceiling with a continuous scene or pattern, while a decal is a smaller, individual graphic used as an accent. Our wall and murals create a complete atmospheric change, whereas decals offer a 15-minute quick fix for smaller spaces like a nursery or office nook.
Can I use a mural in a bathroom or high-humidity area?
You can certainly install our vinyl murals in bathrooms, provided they aren't in direct contact with a shower spray. Our moisture-resistant materials handle humidity levels up to 80 percent without losing their grip. To ensure the best longevity, wait at least 24 hours after installation before running a hot shower. This allows the adhesive to cure fully against the wall surface for a lasting, vibrant finish.
How do I know if my image is high enough resolution for a custom mural?
Your image needs a resolution of at least 100 pixels per inch of the final printed size to look crisp. For a standard 8-foot by 10-foot wall, your file should be approximately 12,000 pixels wide. We recommend using files larger than 15 megabytes in TIFF or high-quality JPEG formats. This ensures every detail remains sharp and vibrant when we scale it up to transform your room.
Do I need professional help to install a large wall mural?
You don't need a professional installer to achieve a high-end look in your home. Two people can typically complete a full wall installation in under 3 hours by following our step-by-step guide. The peel-and-stick backing allows you to reposition panels if you make a mistake during the first 30 minutes of application. This DIY accessibility empowers you to take charge of your interior design with total confidence.
How do I clean my wall mural without damaging the print?
Clean your mural using a soft microfiber cloth dampened with a mixture of 95 percent water and 5 percent mild dish soap. Avoid using abrasive sponges or harsh chemicals like bleach, which can degrade the eco-friendly inks. Gently wipe the surface in a circular motion to remove dust or fingerprints. This simple maintenance routine keeps your premium vinyl looking like new for the entire life of the product.